Screencast-O-Matic recently rebranded to
Screenpal, with a
new look and feel website
and desktop application.
You can continue to use
Screencast-O-Matic as is,
or update to the newest
Screenpal version.
See Updating
Screencast-O-Matic to
Screenpal for
more
information. Updating
the application does not
affect your existing
username/password, saved
content, or
settings.
This
help article covers using
both Screenpal and
Screencast-O-Matic (if you
want to continue to use
the older version). Scroll
down to get to
Screencast-O-Matic
instructions.
Screenpal
When you first open Screenpal
you will be presented with previous
recordings you have created with it.
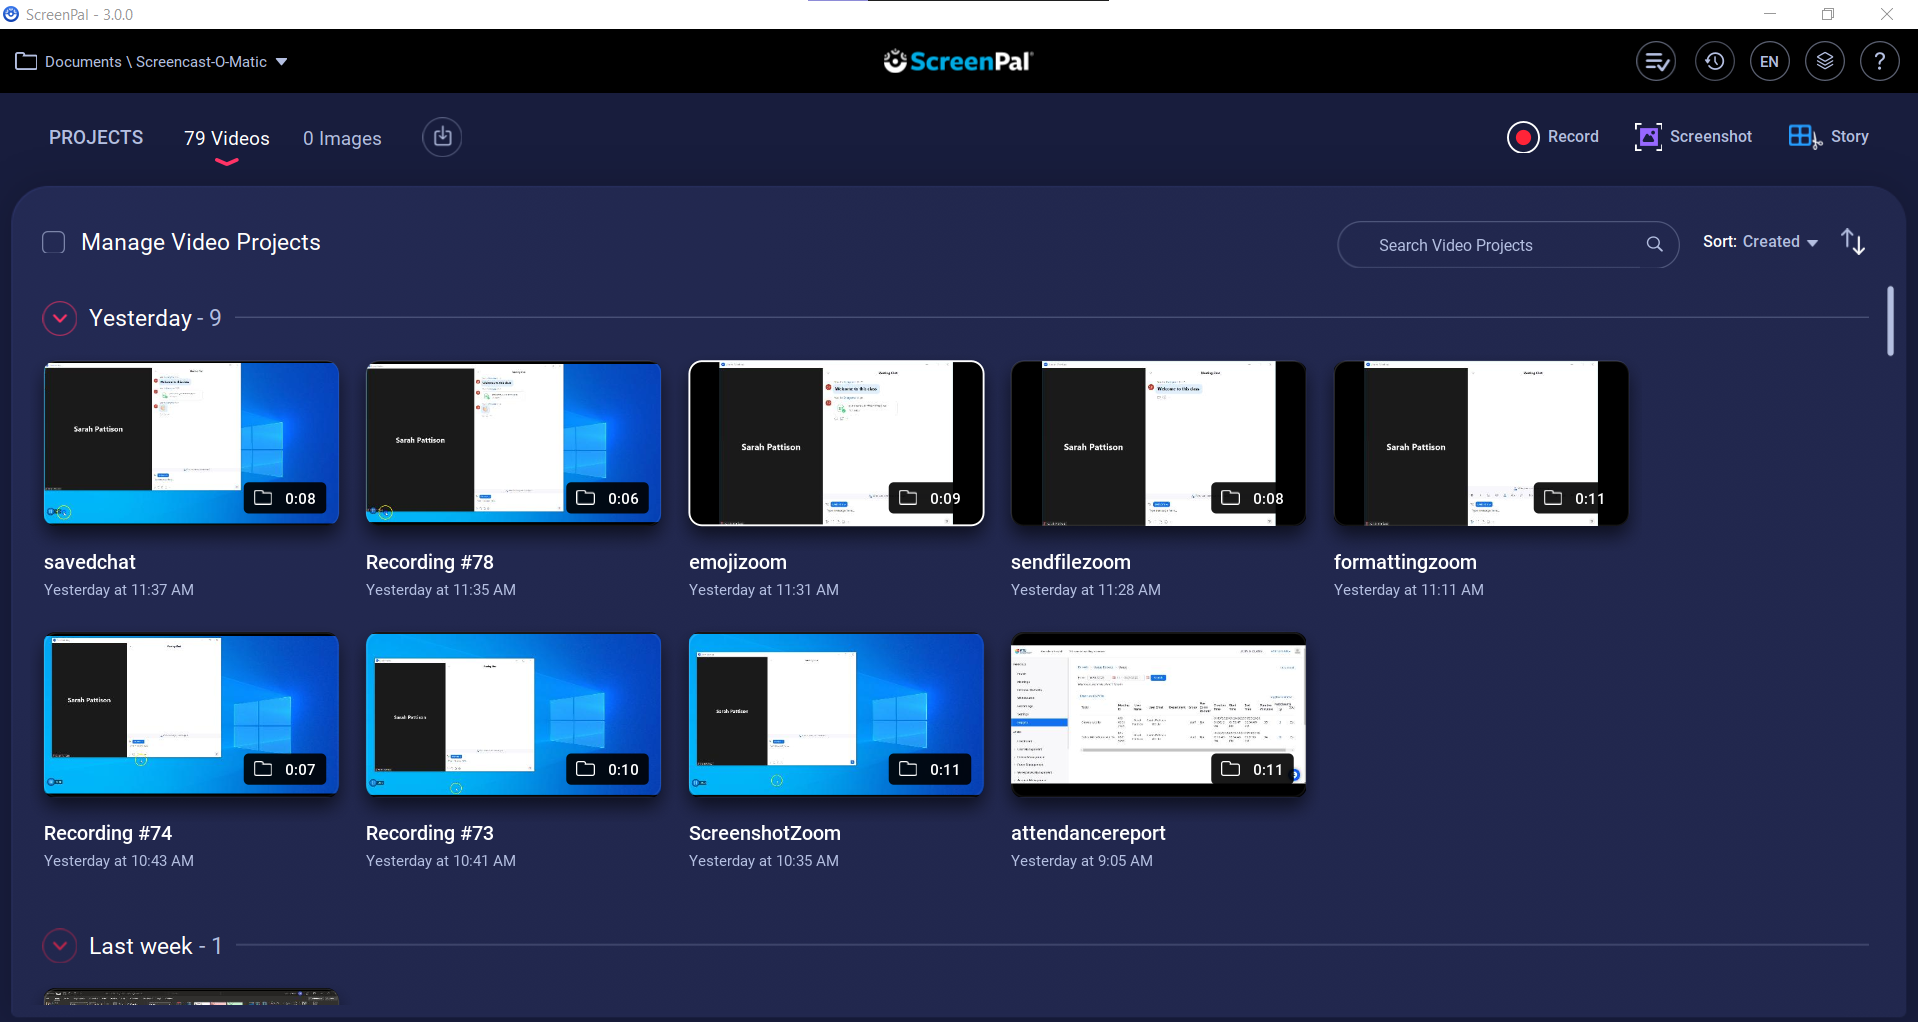
To create a new recording, click Record in the top-right corner of
the window.
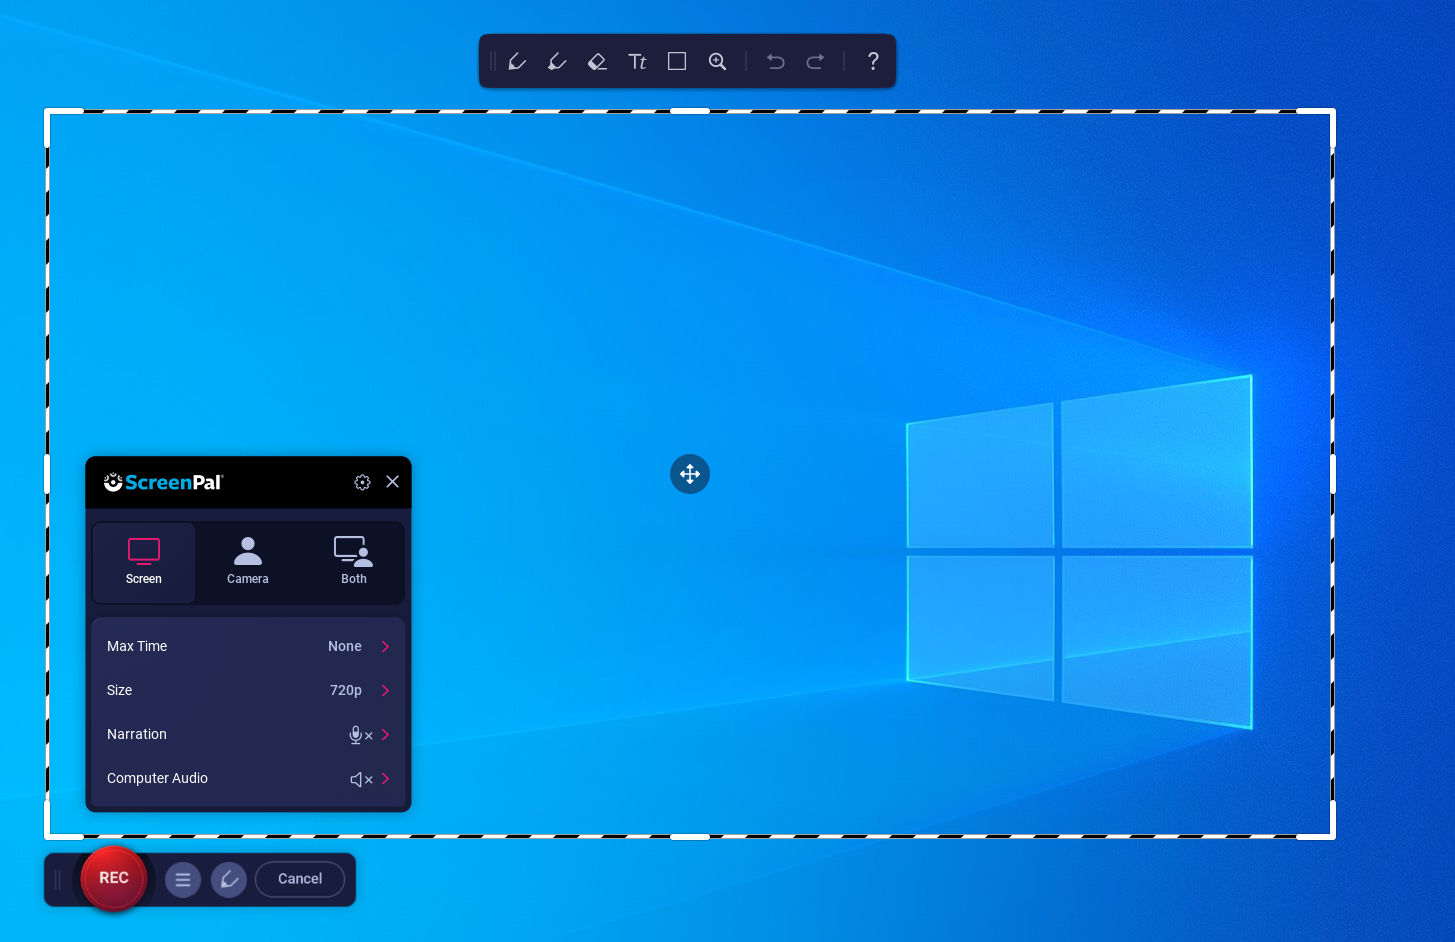
From here, the software will change to a
“recording mode” where you can adjust for
the type of screencast you wish to
create.
You can select whether you
wish to create a recording
using:
- Your screen: This is the most common
option and is suggested for recording
yourself talking over a powerpoint,
using software, completing an
equation, etc.
- Your webcam: This may be useful if you
wish to film yourself demonstrating
how to perform a particular
activity
- Both: This may be useful if you wish
to switch between performance and
activities on your computer, or to
provide a personal touch to a
screen-based recording
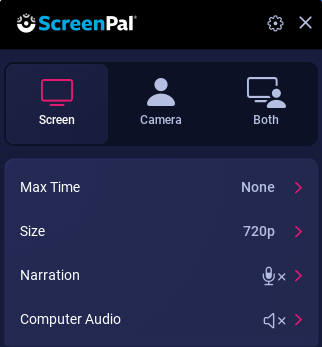
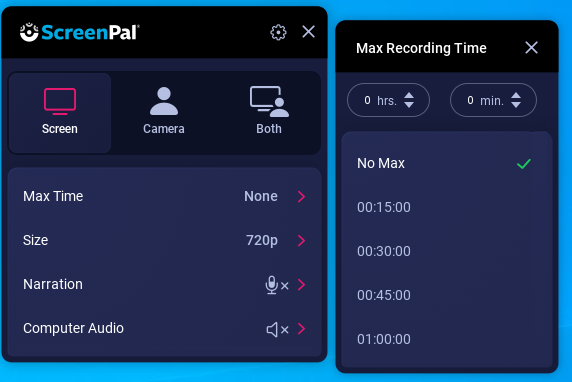
If you wish, you can set a “Max Time”
which will set a specific time limit
your recording. Click on the option and
set a specific time which you wish to set
specific time at which the recording will
end.
It is recommended that you leave this at
“None” in order to avoid limiting yourself
around this.
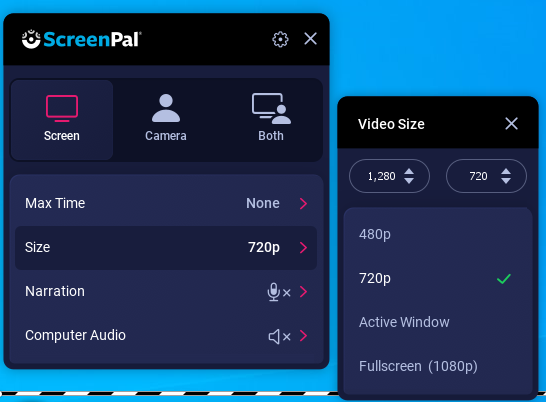
You can set a specific size for your
screencast if you wish. Click on the
“Size” button and you can select if you
want your screencast to be “Fullscreen”
(your entire screen) or a smaller
size
If you set the screen size to less than
“Fullscreen”, you can adjust the box which
appears to record a specific area of the
screen. Drag the white borders at the
sides, top, bottom, and corners to
resize the are to be recorded.
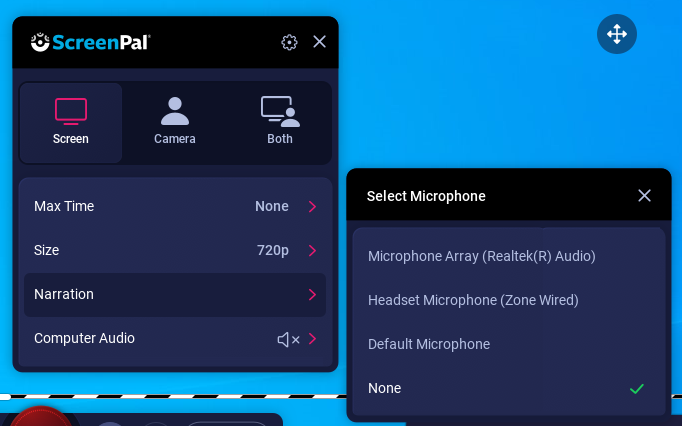
You can select the microphone that you
will use to record the screencast by
clicking Narration and selecting
the appropriate microphone.
You can also click the gear icon  to set
a number of options for recording.
to set
a number of options for recording.
to set
a number of options for recording.When you are ready to begin, you can
press the record icon to begin
recording.

You will be given a countdown and the
recording will begin. You can pause the
recording at any time by clicking the
pause icon.

If you want to, you can also
click the pen icon  to
draw on top of your
recording. This will allow you to
use tools to annotate your recording
live. To exit the annotate mode,
click Exit Drawing.
to
draw on top of your
recording. This will allow you to
use tools to annotate your recording
live. To exit the annotate mode,
click Exit Drawing.
to
draw on top of your
recording. This will allow you to
use tools to annotate your recording
live. To exit the annotate mode,
click Exit Drawing.
When you are satisfied with your
recording, click the pause icon.
When you have paused the recording, you
can:
- Continue recording by clicking the
record icon again.
- View the recording you have done by
clicking the play icon

- Delete what you have recorded and
start again by clicking the trash
icon

- Move on to edit and upload/ download
your video by clicking Done.
Screencast-O-Matic
When you first open
Screencast-O-Matic you will be
presented with previous recordings you
have created with it
To create a new recording, click Record in the top-right corner of
the window
From here, the software will change to a
“recording mode” where you can adjust for
the type of screencast you wish to
create
You can select whether you wish to create
a recording using:
- Your screen: This is the most common
option and is suggested for recording
yourself talking over a powerpoint,
using software, completing an
equation, etc.
- Your webcam: This may be useful if you
wish to film yourself demonstrating
how to perform a particular
activity
- Both: This may be useful if you wish
to switch between performance and
activities on your computer, or to
provide a personal touch to a
screen-based recording
If you wish, you can set a “Max Time”
which will set a specific time limit
your recording. Click on the option and
set a specific time which you wish to set
specific time at which the recording will
end.
It is recommended that you leave this at
“None” in order to avoid limiting yourself
around this.
You can set a specific size for your
screencast if you wish. Click on the
“Size” button and you can select if you
want your screencast to be “Fullscreen”
(your entire screen) or a smaller
size

If you set the screen size to less than
“Fullscreen”, you can adjust the box which
appears to record a specific area of the
screen. Drag the white links at the
- Sides,
- Top and bottom
- Corners
to resize the are to be
recorded
You can select the microphone that you
will use to record the screencast by
clicking on the “Narration” option and
selecting the appropriate microphone
You can also select the “Preferences”
button to set a number of options for
recording
When you are ready to begin, you can
press the record button to begin
recording
You will be given a countdown and the
recording will begin. You can pause the
recording at any time by pressing the blue
Pause button where the recording button
previously was
If you want to, you can also press the
“pen” icon next to the record button to
draw on top of your recording.
This will allow you to use tools
(available at the top of the recording
area) to annotate your recording
live
To exit the annotate mode, simply click
right-click anywhere on-screen and select
“Exit” (this will clear your
annotations)
When you are satisfied with your
recording, press the pause button.
When you have paused the recording, you
can:
- Continue recording by pressing the
Record button again
- View the recording you have done by
pressing the “play” button
- Delete what you have recorded and
start again by pressing the “trash
can” icon
- Move on to edit and upload/ download
your video by pressing the “Done”
button.