Screencast-O-Matic recently rebranded to Screenpal, with a new look and feel website and desktop application. You can continue to use Screencast-O-Matic as is, or update to the newest Screenpal version. See Updating Screencast-O-Matic to Screenpal for more information. Updating the application does not affect your existing username/password, saved content, or settings.
This help article covers using both Screenpal and Screencast-O-Matic (if you want to continue to use the older version). Scroll down to get to Screencast-O-Matic instructions.
Screenpal
After you have finished your recording and click Done, you have three options.
Save/Upload: Choose options to save video file or upload to Screenpal, YouTube, etc without editing the video.
Quick Share: Upload the video to your ScreenPal account and a link to share straight away.
Edit Video: Edit the video in a video editor.
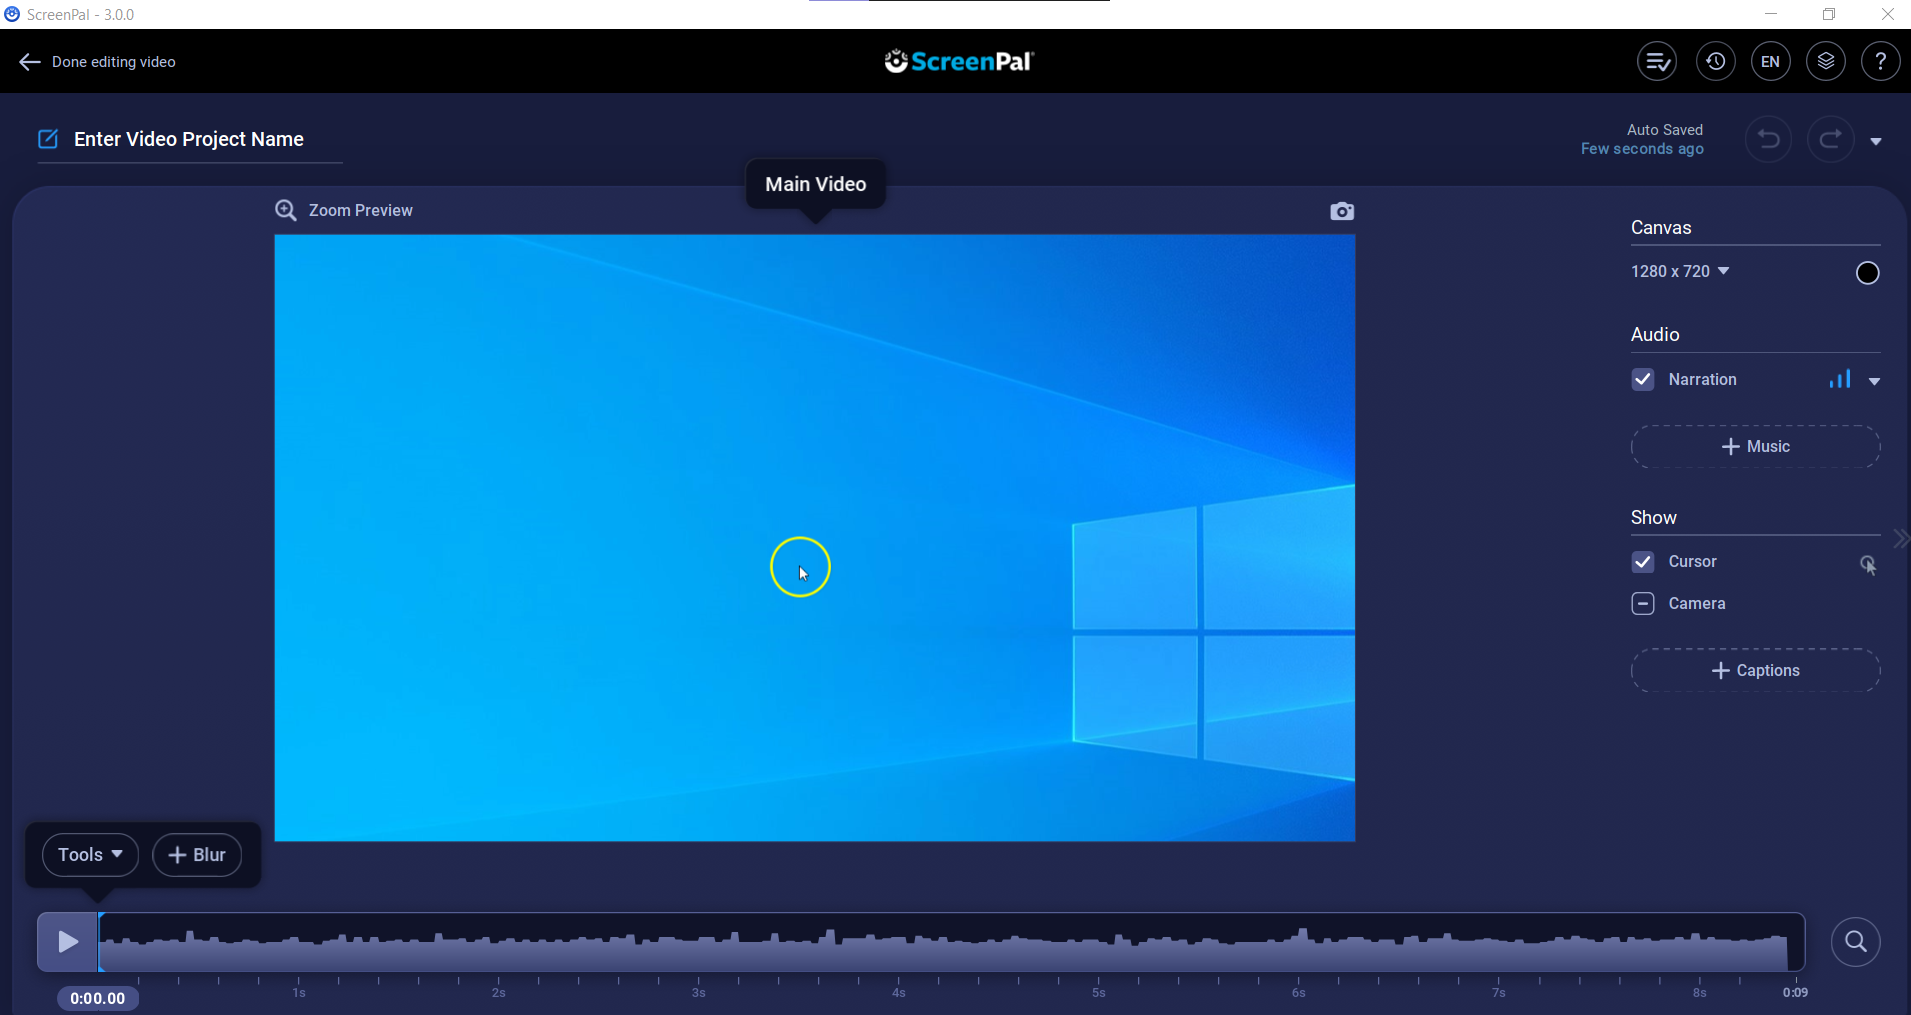
If you click Edit Video, you will be provided with an interface that includes the following:
- At the base of the screen, you can see the timeline for your recording. You can use this to move around to the different sections of your recording by clicking anywhere on the timeline or pressing play
- Options for editing the video under Tools. This will allow you to edit the video or insert elements (e.g. text, pauses, etc.) wherever the video cursor is
- Options for how the video is displayed to viewers under Audio and Show.
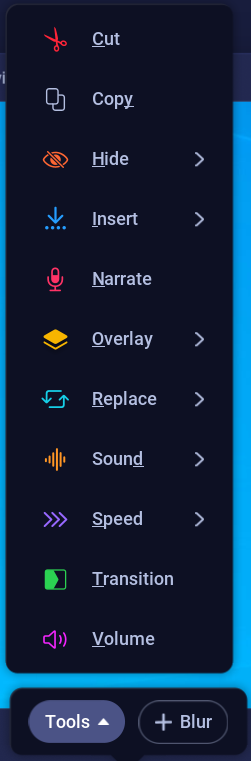
If you move to a part of the recording which you want to edit, and click Tools, you will see a list of options.
Useful tools
Cut: Use the Cut tool to edit out parts of the video. Click Tools, then select Cut. You can then drag a bar to select what to cut and click OK.
Insert: Use the Insert tool to insert new recordings, existing projects, or external video files to the video.
Overlay: Use the Overlay tool to add text, images, shapes, and highlights to the video. Overlays can be dragged anywhere on the canvas.
Screencast-O-Matic
After you have finished your recording, you have the ability to
- Edit it by changing duration, adding or removing sections and adding highlights, text, etc
- To save it as a video file
- To upload it to a cloud service
If you decide to edit the video file, you will be provided with the following interface.
- At the base of the screen, you can see the timeline for your recording. You can use this to move around to the different sections of your recording by clicking anywhere on the timeline or pressing play
- Options for editing the video under “Tools”. This will allow you to edit the video or insert elements (e.g. text, pauses, etc.) wherever the video cursor is
- Options for how the video is displayed to viewers. This determines if you want to add additional audio (e.g music) and/ or a voiceover and/ or if they see the mouse, etc as part of the recording.
If you move to a part of the recording which you want to edit, you can click on the “Tools” item to bring up a list of available options
A useful tool for editing is the “Cut” tool. This allows you to remove sections of the recording. This can be useful if you have a section where you were interrupted or made a mistake, etc. If you select the “Cut” option, you will be provided with the option to select what can be cut by dragging the red bars in the timeline to cover a specific section of the video.
When you have selected a section of the recording with your red bars (e.g. a start point and end point), you will be given the option to
- Preview this (This will show you what the recording will look like when you cut this section out)
- To Cancel this
- To “OK” this.
If you select OK, the area of the recording identified by the red bars will be removed
Another useful feature is the ability to add text to your recording. This can be useful if you want to provide additional guidance to learners about a specific part of the recording or on-screen item. If you select the “Overlay” option, you can then click on the “Text” item.
If you select the “Text” option, you will be provided with the option to select
What section of the recording the text should appear over
Where it should appear on screen and how it should appear (fade in/ out, etc.)
What it should say and how it should look
You can edit what part (e.g. from what time to what time) of the recording the text should appear over by
1. Dragging the bars on the timeline at the base of the screen
2. You can also increase or decrease the time by clicking on the time section
To edit the text and where it is displayed, simply click into the text box and change the text as appropriate in the text area which appears. You can also click on “style” to change the appearance of the text box
You can move the position of the text item (where it appears on-screen) by clicking and dragging on the text item